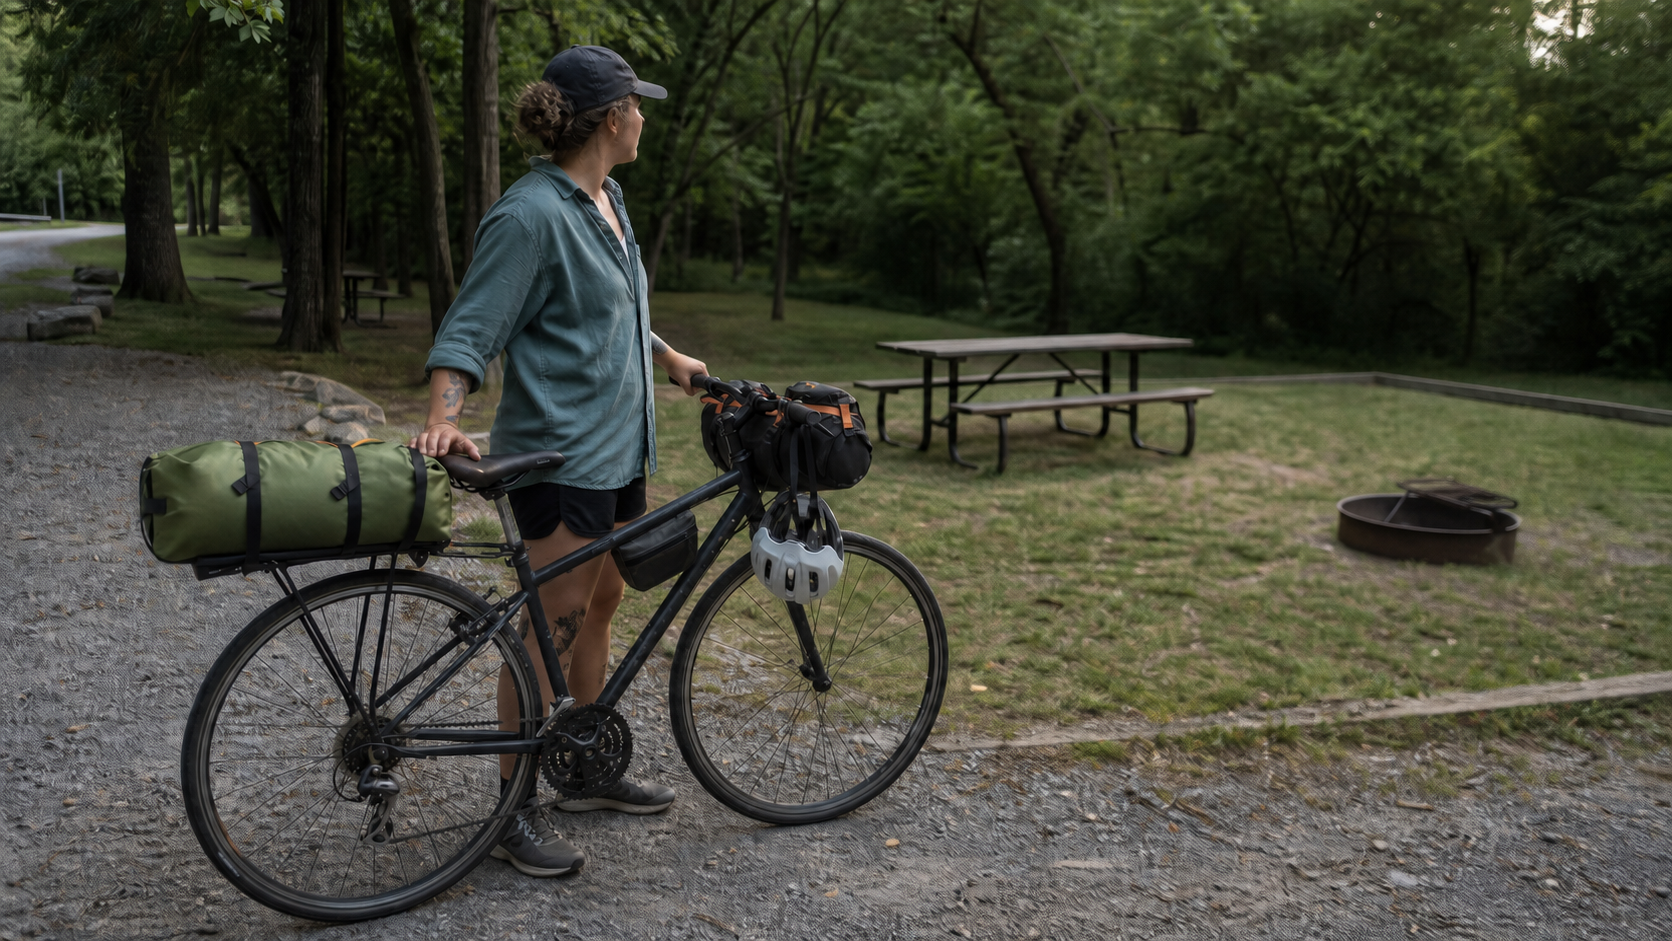
Bikepacking does not begin with a perfect bike or a wall full of expensive bags. It begins with a ride you can manage, a simple camp, and the decision to spend one night outside.
This beginner’s guide to bikepacking is built around one achievable trip. You will learn how to use the bike and camping gear you own, secure the load, and plan a route with room for mistakes. The goal is not to prepare for every expedition. It is to complete your first overnight and return with useful notes for the next one.
Before you begin: This guide assumes you can already spend a night outside safely. If not, start in your backyard—with a friend or family member if that helps. Set up your shelter, prepare food, sleep outside, and learn what you need. Then load the same gear onto your bike and ride around the block. Bikepacking adds carrying and riding problems to camping; it should not be your first test of both at once.
If nerves are the barrier: Rehearse the trip without staying overnight. Ride your loaded bike to camp, set up, eat, relax, then pack and ride home. Repeat as needed. Each practice run removes uncertainty until sleeping there is the only unfamiliar step.
The First Rules of Bikepacking
Rule 1: Become a bikepacker. Ride your bike somewhere you can camp, spend the night outside, and ride home. Keep it close, simple, and manageable. All the equipment knowledge in the world cannot make the first trip for you. Eventually, confidence begins with one manageable night outside.
You do not have to do it alone. Many bikepackers prefer traveling with a friend, partner, family member, or small group—and some never choose to camp solo. Bikepacking is not a test of solitude. If having someone beside you makes the first night possible, invite them. There is room for one more.
Rule 2: Test your gear and go a little farther. Notice what worked, what did not, and what you never used. Fix the problems the trip revealed, then repeat with a little more distance, time, or unfamiliarity when you feel ready.
Your first overnight does not need to resemble an expedition. Think of it as a tiny car-camping trip where the bicycle is your transportation. Stay close enough that going home remains easy. Set up, eat, hear the unfamiliar sounds after dark, sleep, pack, and ride home. The accomplishment is discovering that the night ended and you handled it.
Bikepacking 101: How to Start Bikepacking
- Choose a nearby overnight route. Start with familiar roads, mellow gravel, or easy trails and a legal campsite.
- Use the bike you already ride. Make sure it fits, shifts, brakes, and carries your load securely.
- Borrow, rent, or repurpose camping gear. A practical shelter and sleep system matter more than owning dedicated bikepacking equipment.
- Bring enough to spend the night and get home. Pack shelter, sleep gear, food, water, lights, suitable clothing, and only the repair items you understand how to use.
- Take a loaded shakedown ride. Find rattles, tire rub, loose straps, and handling problems close to home.
- Keep the first trip short. One night is long enough to test the whole system.
If you want the smallest possible first step, see BPL’s Start Here guide and its approach to building confidence one practical ride at a time.
What is bikepacking?
Bikepacking combines cycling with self-supported camping. You carry what you need to ride, eat, handle common problems, and sleep outside. Routes may mix pavement, gravel, dirt roads, and singletrack, but the surface does not define the activity. A local rail trail and campground can be a legitimate first trip.
A loaded bike lets you travel while remaining connected to the landscape. For a beginner, that freedom matters more than labels or matching equipment.
Bikepacking vs. bicycle touring
Traditional bike touring, also called bicycle touring, often uses racks and panniers on paved routes or longer journeys. Bikepacking commonly uses soft luggage that keeps the load narrower for rough surfaces. The styles overlap: panniers are not forbidden, and soft bags do not create an off-road expedition.
Use the carrying system that fits your bike, route, budget, and camping gear. A secure, balanced load matters more than looking ready for a magazine cover.
Bikepacking vs. backpacking
Backpacking puts the load on your body. Bikepacking lets the bike carry it, but adds tires, brakes, bag clearance, and loaded-bike handling. You may cover more ground, although rough terrain and mechanical delays can slow the day.
Do you need a special bike for bikepacking?
No. Virtually any reliable bike can handle an appropriate first route. A mountain bike is comfortable on rough trails, a gravel bike works well on mixed surfaces, and a road bike can carry you through a paved or hard-packed overnighter. The best bike is usually the one that fits you, is mechanically sound, and matches the terrain you selected.
Before loading it, check the tires, brake pads, chain, bolts, and shifting. Confirm that bags cannot touch a tire or interfere with steering and braking. If you are unsure about its condition, a local bike shop inspection is more valuable than a cosmetic upgrade.
Let the first trip diagnose the bike
Do not rebuild or replace your bike to solve problems you have not experienced yet. Choose a route that suits the bike you already own, load it securely, and see what the ride teaches you. One rider may discover that lower gearing or more tire clearance would open the routes they want to ride. Another may learn that a beach cruiser works perfectly well for flat local overnighters.
Drivetrain labels such as 1x and 2x matter less than the result. A 1x has one chainring near the pedals; a 2x has two and may provide more range. Ask what happened: Did you have a low enough gear? Was the bike comfortable and controllable when loaded? If the bike was not the problem on night one, that is valuable data—and a good reason not to replace it.
Change something when a real trip identifies a real limitation. Until then, keep riding.
A future BPL buyer’s guide will use evidence from your rides to separate must-haves from expensive nice-to-haves. It will cover fit, gearing, tire clearance, capacity, mounting, and repairability. Carbon can work, but bag contact points require protection, cleaning, and inspection—and fit and reliability may matter more than a few saved pounds.
Bikepacking Gear List for Beginners
Your first bikepacking gear list should help you sleep, stay protected, eat and drink, and get home. Begin with camping gear you already own, then replace only the items that prove uncomfortable, unreliable, too heavy, or too bulky to carry safely.
Shelter and sleep system
These are planning categories, not a universal packing list. Your shelter must suit the environment and what your bike can reasonably carry. A car-camping tent may be too heavy or bulky. Attach your proposed system and test-ride it; if it overwhelms the bike, borrow or rent something more practical before buying.
No single sleep system works everywhere. A humid campground, high-elevation site, equatorial hammock camp, or trip through bear country may demand different insulation, weather and insect protection, food storage, and campsite practices. Your job is to learn what your location and conditions require.
- A tent, hammock, bivy, or other shelter that suits the campsite, forecast, and carrying space
- A sleeping bag or quilt rated for the expected overnight temperature
- A sleeping pad or hammock under-insulation appropriate to the conditions
- A dry layer reserved for camp and sleep
Check current land-manager guidance and, if possible, learn from local hikers or bikepackers who regularly camp there. BPL will explore these systems in depth; for now, treat this list as reference, not automatic recommendations.
Protect insulation from water. A waterproof dry bag or liner matters more than shaving a few ounces. If hammock camping interests you, BPL’s hammock rain test shows why a backyard trial is worth doing before a wet trip.
What to Pack for Bikepacking: Food, Water, and Clothing
- Enough water capacity for the longest dry section, plus a treatment or resupply plan
- Simple food you already tolerate while riding
- One emergency snack that is not part of the planned meals
- Layers for the low temperature, wind, sun, and rain forecast
- Basic hygiene items and any personal medication
Keep the first menu easy. A cold dinner, a prepared meal, or food purchased near camp can remove the stove and cookware from a first setup. Complexity can come later.
Bring enough to get there and back
Keep the support plan as simple as the trip. Save the route on a charged phone, tell someone where you are going, and bring lights in case the ride takes longer than expected. Carry identification, medication, and any personal item you genuinely require.
Bring only repair supplies you understand. A tube or patch, pump, tire levers, and small multitool solve common problems, but they are not an entrance exam. If you cannot fix something, walk, call for a ride, or use a planned bailout point.
Route choice is part of the safety system. Staying near roads, services, and people lets you learn without preparing for an imaginary expedition.
What can wait until later?
Ultralight cookware, a dedicated bikepacking bike, premium bags, duplicate clothing, and specialized electronics can wait. Borrow or rent before buying when possible. BPL’s guide to bikepacking on a budget and its list of useful everyday gear can help you start without turning the trip into a shopping project.
Bikepacking bags and how to load the bike
A typical bikepacking setup may combine a seat pack, frame bag, handlebar roll, top-tube bag, and small accessory pouches. You do not need the complete set. Begin with something that already fits your bike securely: a small seat bag, handlebar roll, basket, bags you own, or a dry bag secured lengthwise on top of a stable rear rack. Keep the load narrow, tight, and clear of the tires, brakes, cables, and your legs. Do not build your first trip around finding specialized luggage to borrow.
- Frame bag: Put dense items such as tools, food, and some water low and near the center of the bike.
- Handlebar bag: Carry bulky, light items such as a sleeping bag, clothing, or part of the shelter. Preserve brake, cable, and tire clearance.
- Seat pack: Pack light, compressible gear tightly so the bag does not sway or rub the rear tire.
- Easy-access bags: Keep snacks, sunscreen, navigation, and rain protection where you can reach them without unpacking camp.
A small, light backpack may work perfectly well for a short first overnight. Test it and notice how your shoulders, back, and body temperature respond.
Moving the main load onto the bike matters more when you cross town to reach a trail, explore farther campsites, approach 30 miles, or count saddle time in hours. That is when weight becomes noticeable mile by mile. BPL explains the transition in Bikepacking Tip #1.
Planning Your First Bikepacking Trip and Route
Bikepacking route planning begins with the kind of first morning you want. A nearby campsite, reliable water, manageable weather, and a clear route home create a better learning environment than a remote objective with no margin.
Pick a beginner-friendly route
Choose familiar terrain, an easy-to-follow route, or simply a ride you already love that offers a camping opportunity. Keep the challenge appropriate to your current ability, confirm that bicycles are permitted, and know how you can shorten the trip or get home if needed. A nearby store, public road, transit stop, or pickup point may be all the backup plan your first overnight requires.
For the first trip, a sub-24-hour overnighter is one useful format: ride out in the afternoon, camp, and return the next morning. BPL’s first sub-24-hour shakedown expands this approach.
How many miles or hours should a beginner ride?
There is no universal number. A loaded bike, loose gravel, sand, heat, headwinds, and elevation can cut your normal pace dramatically. Start with roughly half to two-thirds of a comfortable unloaded day, then add generous time for navigation, food, mechanical problems, and setting up camp before dark.
Hours are often a better planning tool than miles. Three relaxed riding hours on familiar terrain may be plenty for a first overnight. Your route should feel almost too easy on paper.
Where can you sleep when bikepacking?
Designated campsites are the clearest legal option: public or private campgrounds, established backcountry sites, or land where dispersed camping is explicitly permitted. Rules differ among parks, forests, states, and countries, so verify current regulations, reservations, fire restrictions, water availability, and bicycle access with the land manager. Do not assume an attractive patch of land is open to camping.
Have we stealth camped where we probably should not have? Yes. Did we occasionally feel bad about it? Also yes. That makes it a story, not a recommendation. If you choose to camp in a nondesignated location, you accept the legal, personal, and environmental risks of that decision. Research the rules, respect private property, leave no trace, and own the consequences of the choices you make. BPL does not encourage trespassing or camping where it is prohibited.
Check weather and build a bailout plan
Review temperature, rain, wind, and severe-weather risk for both the route and campsite. Tell someone where you are going, when you expect to return, and what to do if you miss a check-in. Save the route offline and note practical exits.
When possible, avoid inclement weather until you can pitch your shelter confidently and quickly. Practice at home—even in wind or light rain when safe—so bad conditions are not also your first encounter with the poles, stakes, or rainfly. Forecasts can be wrong, so carry the basic protection your season and location require.
Rain does not automatically cancel a trip, but it reduces the margin. Keep insulation dry and learn a drying routine. BPL’s wet-weather shoe strategy solves one ordinary problem before it ruins the next day.
Know your area
Local knowledge is essential. Learn the wildlife, terrain, weather, access rules, fire restrictions, and water conditions for your route. Consult current forecasts and the land manager or local authority; nearby hiking and bikepacking groups can explain details experienced campers take for granted. The goal is not to fear the outdoors. It is to enter informed and make decisions that suit your experience and conditions.
Take a loaded shakedown ride
Pack the bike as you plan to leave, then ride surfaces like the route. Brake, start, stop, turn slowly, and listen for movement. A loose, delayed, or “Jell-O-like” feeling can mean the load is shifting independently of the bike. Stop and tighten it.
If the old bungee in your trunk is what you have, use it—provided it is sound. Secure its hooks and keep every loose end away from the wheels, chain, brakes, and spokes. Try a familiar hill if the trip includes climbing. There is no performance target; the bike only needs to remain comfortable, predictable, and secure.
Use the ride to test clothing, lights, food, and navigation too. An everyday route can reveal more than an evening spent rearranging gear indoors. Even a bike commute can become a useful shakedown and practice ride.
A practical first-overnight checklist
One week before
- Confirm the route, campsite, access rules, and water plan.
- Inspect the bike and complete any repair you are not comfortable postponing.
- Test shelter and sleep gear at home.
The day before
- Check the forecast and adjust the plan instead of merely adding gear.
- Load the bike and take a short test ride.
- Download maps, charge electronics, and share the route.
Before leaving
- Check tire pressure, brakes, lights, straps, water, and identification.
- Leave enough time to reach camp and set up before dark.
- Remember that turning around is a successful use of good judgment.
Bikepacking Tips: Common Beginner Mistakes
- Buying everything first: Real trips reveal which upgrades matter to you.
- Overpacking: Extra items consume space and make the bike harder to handle.
- Choosing a heroic route: Your first trip should test systems, not prove toughness.
- Skipping the loaded ride: A bag that looks stable in the garage may sway or rub outside.
- Ignoring camp setup time: Darkness turns small problems into frustrating ones.
- Planning by unloaded speed: Use conservative riding time and protect your margin.
Bikepacking for beginners: frequently asked questions
Is bikepacking harder than backpacking?
It is different. The bike carries the weight and covers distance efficiently, but rough terrain, mechanical problems, and loaded-bike handling add complexity. Choose the activity and route that match your current skills.
Do you need training for bikepacking?
You do not need a formal training plan for a short route comfortably within your normal riding ability. You should, however, ride the loaded bike and confirm that the distance, terrain, and time are realistic. Increase duration gradually for longer trips.
Can a day trip count as bikepacking?
A day ride can test a bikepacking setup, but camping is normally part of bikepacking. Treat a loaded day trip as a valuable rehearsal for the overnight.
What is the most important bikepacking tip?
Have a micro-adventure. Make the first trip easy enough to begin, spend a night outside, and reconnect with the older human rhythm of traveling through and living in the outdoors. Use a nearby route, carry what you need, test the loaded bike, and leave room to learn. Experience will tell you more about the setup that works for you than another week of shopping.
Ready to Go Bikepacking?
You do not have to become an expert before your first bikepacking adventure. Choose one night, one manageable route, and a camp system you have tested. Pack the bike securely, keep the plan flexible, and pay attention to what the miles teach you.
The miles are the changing force in bikepacking. You enter the route carrying uncertainty and return shaped by what happened there. You may arrive as stone, but the route is the chisel that makes the rider. Your first trip does not need to create the finished person. It only needs to make the first mark.
After enough time outside, the woods begin to feel less like somewhere you visit and more like somewhere you belong. That sense of belonging is not learned from a checklist. It is walked, pedaled, and slept into you.
When you return, write down what you used, what stayed buried, what got wet, and what made the ride better. That short list is the beginning of your real bikepacking setup—and your next trip.